44 RCMW December 2008
X-Twins DIY Aero System
black lead to the
left. Each motor
comes with a prop
fitted and is mount-
ed on a plastic plate.
This is held in place with a similar plate on the top of the wing
and these clip together. Both the props protrude through a slot in
the wing on this X-Twin DIY jet-style model.
The receiver and blue 200 mAh LiPo battery pack come as two
modules and are simply assembled as shown. An On-Off switch
and motor lead socket are mounted to the left side with a charge
socket, frequency band selector switch and the second motor lead
socket on the other. The now single unit passes through the fuse-
lage and is held with a retainer plate each side that lock together.
The single stranded copper-coated aerial wire runs the length of
the fuselage and is held with tape.
Finally a carbon fibre square spar is added that simply clips into
the motor mounts, and carbon wing struts; one to each side that
clip into the motor and fuselage, while a wire undercarriage with
two tiny wheels clip in place. It takes longer to write about it than
it takes to build it!
After a short charge from the integral transmitter charger the
‘jet’ is ready to fly.
Flying
Using the supplied simple 2-channel radio the power was first
tested before a flight was attempted. It seemed to have plenty, and
a taxi test on hard ground proved that a take off from a hard
surface would be possible. Proportional power is provided by twin
pusher electric motors turning contra-rotating props enabling
straight and level flight, and therefore taking off from a floor in a
large hall should be no problem either. A trim control on the
transmitter enables trim balance of the two motors for straight-
line flight.
The test flight was carried out on a very calm day outdoors, and
with a little over half power applied a simple hand launch was all
that was required to get the King Hawker into the air and away.
Due to the integral incidence of the wings and motors, the throt-
tle is used for maintaining height, so the less power applied results
in less height; increase the power to climb. Shut the power off and
the model will descend rapidly in a steep glide. Turns are carried
out using the right control stick which is a proportional speed
control operating two individual ESCs in the sealed receiver unit.
The turns are quite effective and the model will invert and dive if
over-controlled. A careful balance of throttle and turning control
is required to maintain a steady flight. Over-exuberant use of the
controls will result in the model stalling, but after a few minutes
of cautious flying it can be mastered and quite entertaining to fly,
and even capable of some basic aerobatics too!
It’s A Kit!
As the X-Twin™ Ready-To-Fly mini R/C aeroplanes have become
firmly established with serious indoor model flyers around the
country, it has become increasingly clear that many modellers see
considerable potential to develop different styles using Silverlit®
hardware. You only have to visit the Flying Toys website to find
out (see Contacts) and click on ‘Gallery’.
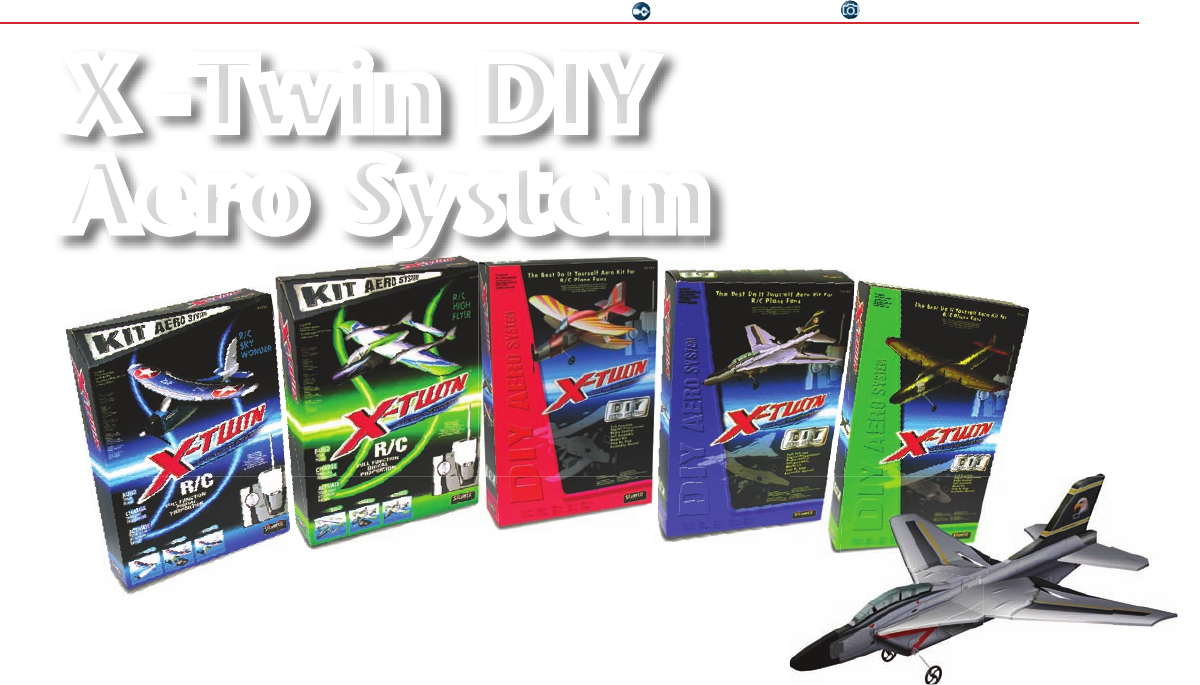
To allow newcomers to easily experience the enjoyment of build-
ing their own choice of model subject, Flying Toys have intro-
duced the X-Twin DIY Aero System, offering five different series of
designs to suit both beginners and traditional model enthusiasts.
There are ten pre-fabricated kits in the range, each with its own
informative step-by-step assembly manual, and featuring simple
to assemble and fly single motor Easy Sets, Basic kits, Standard
and Advanced Twins, and the Professional set incorporating four
powerful electric motors.
Charging direct from the transmitter’s built-in charger in less
than half an hour can provide controlled flights of around 10
minutes between charges (dependant upon throttle usage) as
each model is fitted with its own 3.7 volt LiPo battery. All the
X-Twin DIY series models are available on 27 MHz bands A, B and
C, to allow up to three different Silverlit models to be flown
together at the same time.
Included in the attractive new style gift box packaging is an
informative assembly and flight manual, two spare propellers
and all you need to take-off within minutes of opening the box,
with no glue required.
In addition to the X-Twin you will need to purchase 6 x AA
Alkaline batteries for the integral transmitter/charger provided.
‘five different series of
designs’
Simple Assembly
The example tested here is the Advanced Series ‘King Hawker’
– a jet-type aeroplane. All the components are packed individu-
ally in a moulded plastic tray, and are easily identified from
details in the instruction manual. This is a profile model and each
airframe part is made from EPP foam, pre-coloured in a military
style and has cutouts pre-cut that are simply pushed out.
The wings are fitted first and there are three special ‘T’ pieces
that fit into the slot, while the wing featuring a re-shaped aerofoil
section simply slides into the pre-cut slot and is held in place with
pieces of clear adhesive tape supplied. The tailplane fits in a
similar manner. The motors are then installed with the red and
Tony van Geffen Tony Van Geffen/Bruce Corfe
X - Twin DIY
Aero System
RCMW takes a closer look at
these indoor, or fine weather
outdoor, self-assembly models for
beginners to radio control flying
or enthusiasts
RCMW DEC pX-TWINS DIY.indd 44 27/10/08 10:40:58

 (20 strony)
 (1 strony)
 (4 strony)
 Manymanuals.com
 Manymanuals.de
 Manymanuals.fr
 Manymanuals.it
 Manymanuals.pl
 Manymanuals.cz
 Manymanuals.es
 Manymanuals-pt.com
Komentarze do niniejszej Instrukcji